
Last updated November 18, 2026








Free written scope consultation - allowances, timeline, and change-order rules on paper before a single trade is scheduled
General Contractor Maintenance Schedule: What to Do and When
Ask any homeowner what they were told at the end of a remodel and most will say some version of “call us if anything comes up.” That’s it. That’s the whole plan. Then the caulk behind the kitchen sink cracks in month two, the grout settles in the hall bath by month four, and a cabinet door starts hanging crooked because the hinge screws worked loose in month seven. None of it is a construction defect. All of it is normal settling, and all of it is cheap to fix if someone checks at the right time. This guide walks you through the first twelve months after a renovation, step by step, with the trade categories most likely to need a look and the timing that catches a two-dollar problem before it turns into a two-thousand-dollar repair. We’re writing it from Whitney, where the desert climate changes the timing entirely.
Quick Answer
A post-remodel maintenance schedule is a month-by-month checklist for the first year after construction finishes: caulk and grout inspected at 30 days, cabinet hardware and door alignment checked by day 30, paint touch-ups and trim at 60 to 90 days, mechanical systems (vents, supply lines, drain pans) at 90 days, and a full annual inspection at the one-year mark before your workmanship guarantee expires. In Whitney, Nevada, the dry air and high UV exposure mean caulk and exterior finishes fail faster than national averages, so exterior items deserve a second look at six months too.
Styles & brands we work with
- Kitchen remodeling
- Bathroom remodeling
- Home additions & ADU
- Roofing
- Windows & doors
- Driveway & pavers
- Fence
Table of Contents
- The 30-Day Walkthrough: What Settles First
- Why the Whitney Climate Changes the Schedule
- Cabinetry and Hardware: The Month-by-Month Check
- Tile, Grout, and Caulk: Where Water Wins
- Paint and Trim: The Desert UV Problem
- Mechanical Systems and Permit-Pulled Work
- What’s Inside a Guarantee Window and What Isn’t
- How to Document Work for a One-Year Callback
The 30-Day Walkthrough: What Settles First
Day thirty is the most important check in the whole year, and almost nobody does it. Here’s why: materials in a freshly finished room have spent weeks moving. Wood framing dries and shrinks a hair. Tile thinset cures fully and pulls slightly away from grout lines. Caulk skins over, then flexes for the first time as the season shifts. Cabinet hinges and drawer slides have been opened and closed a few hundred times, which is enough to reveal any screw that wasn’t torqued correctly at install.
Walk the finished room with a notebook and a phone camera on day thirty. The list below is the order we’d do it in:
- Caulk joints at the sink, tub, backsplash, and window trim. Look for hairline gaps where the caulk meets the wall. Press with a fingertip; it should feel firm, not slippery or pulling away.
- Grout lines in the shower and on the floor. Run a fingernail along a few; if grout crumbles to powder, that joint needs attention.
- Cabinet doors and drawers. Open every one. Check that doors align at the top and that drawers slide smoothly without a wobble.
- Hinge screws and drawer slides. A screw that turns freely in its hole has already stripped. Note which ones.
- Paint and drywall seams. Look along the ceiling line and inside corners for hairline cracks, which are normal at 30 days and easy to fill.
- Under-sink and behind-appliance areas. Run a dry paper towel along supply lines and the dishwasher connection to check for slow weeps.
The 30-day check takes about 45 minutes in a kitchen and 20 minutes in a bathroom. If you’re in a Whitney home with a newly finished bathroom remodel, this is also the moment to run the shower for five minutes and check the base of the tile wall for any softness or discoloration.
Why the Whitney Climate Changes the Schedule
National maintenance guides are written for a temperate climate with average humidity around 50%. Whitney runs far drier than that, and the UV index here is high for most of the year. That combination has a specific effect on finished materials, and it shifts a handful of items on the schedule earlier.
Here’s what we see in Whitney homes:
- Caulk fails faster. A latex caulk bead that might last two years in a humid climate can dry out and crack in ten to fourteen months here. Silicone holds up better, but it still shrinks as it cures. Re-caulk the kitchen sink and tub surround every 12 to 18 months rather than every two years.
- Exterior paint and primer take a beating. The south and west faces of a Whitney house get the most direct sun. Paint there chalks and fades sooner than the north side. Plan to inspect exterior paint at the six-month mark, not just at twelve.
- Wood trim shrinks and opens joints. Interior wood trim that was tight at install can gap a hair at the mitered corners in the first dry season. Caulk and paint fill the gap, but if you ignore it, the gap widens.
- Stucco and siding need a look after monsoon season. If you used James Hardie siding on the exterior, check the caulk lines at the seams and around window openings after the first wet stretch. Hardie holds up well, but the caulk around it is the weak point.
None of this is a reason to worry about your remodel. It’s a reason to put the maintenance checks on a schedule tuned to where you actually live, rather than to a generic checklist from a magazine.
Cabinetry and Hardware: The Month-by-Month Check
Cabinet failure is rarely a cabinet’s fault. It’s almost always hardware, and hardware is the cheapest thing in the room to fix. When we install KraftMaid or Wellborn cabinetry, the boxes themselves are solid; the adjustment points are hinges, drawer slides, and the screws holding both. Those work loose under normal use, and they work loose faster in a dry climate because wood shrinks slightly and the screw holes lose their grip.
Follow this schedule for the first year:
- Day 30: Open and close every door and drawer. Note any that rub, stick, or hang unevenly. Check hinge screws with a screwdriver; if one turns freely, it’s stripped and needs a longer screw or a wood filler repair.
- Day 90: Re-check the same list. Anything that loosened once will likely loosen again. If a hinge is soft in its hole, this is the moment to fix it before it pulls out.
- Day 180: Check drawer slides for smoothness. Wipe the tracks clean of dust, which builds up fast in a Whitney home during dry, windy months, then apply a light silicone spray if the slide manufacturer allows it.
- Month 12: Full re-check before the guarantee window closes. Any cabinet issue that’s going to show itself will have shown up by now.
Countertops are the other cabinetry-adjacent item worth watching. Cambria, Silestone, and Caesarstone are all engineered quartz and don’t need sealing, but the caulk joint where the counter meets the backsplash does need a look at 30 days and again at one year. A cracked bead there lets water behind the counter, and that’s the kind of small leak that damages the substrate before you notice.
Tile, Grout, and Caulk: Where Water Wins
Tile failure is almost always a water problem, and water problems almost always start at the joints. If you had a bathroom remodeled in Whitney, the tile assembly is built on cement board substrate (the moisture-resistant layer behind your tile) with a waterproofing membrane over it. The tile itself is nearly indestructible. The grout and caulk are not.
What to check and when:
- Shower floor and walls at 30 days: Look for any grout that has cracked or pulled away from the tile edge. A hairline crack in a shower wall is common and easy to seal; a soft, discolored spot at the floor is not, and should be looked at right away.
- Caulk at the shower corners and tub edge at 30 and 90 days: This is the highest-stress joint in any bathroom. It flexes every time someone steps into the tub or leans on the wall. Look for any gap at the top or bottom of the bead.
- Floor tile grout at 6 months: Walk the floor barefoot. Any loose tile will click or move slightly underfoot. Note it; a single loose tile is a quick fix, but a field of them points to a substrate issue.
- Grout sealer annually: Most cement-based grouts benefit from a sealer application every 12 months, especially in a shower. Testing is simple: put a few drops of water on the grout line; if it soaks in within a few seconds, the sealer has worn off.
If you see a soft spot, a spongy feel underfoot, or discoloration that keeps returning after cleaning, don’t put a second bead of caulk over it. That’s the moment to call. Water trapped behind tile can rot substrate and framing, and the repair cost multiplies the longer it sits.
Paint and Trim: The Desert UV Problem
Interior paint in a Whitney home holds up well because there’s no humidity to blister it. Exterior paint is a different story. The UV exposure here breaks down the binder in paint faster than in most of the country, and the result is chalking (a powdery film), fading, and eventually cracking and peeling. If you had exterior work done with James Hardie siding, the fiber cement itself is rated to last decades, but the factory finish and any field-painted trim around it still need a look each year.
The schedule we’d follow:
- Month 2 to 3: Interior touch-ups. Any paint touch-up needed on drywall or trim should be done before the workmanship window narrows. Small cracks at ceiling corners are normal; fill, sand, and paint.
- Month 6: Exterior inspection before the first full summer. Walk the south and west faces; look for chalking (rub a finger along the paint; if it comes away powdery white, that’s chalking), fading, and any hairline cracks in the caulk around windows and doors.
- Month 9: Interior trim check. Wood expands and shrinks with the seasons, and mitered corners at door and window casings can open slightly in the dry months. A dab of paintable caulk and a coat of paint closes it.
- Month 12: Full exterior re-inspection before the guarantee window closes. If you’re seeing peeling within the first year on a newly painted surface, that’s a warranty conversation, not a maintenance item.
Trim maintenance is one of those things that’s easy to skip and expensive to defer. A small gap at the corner of a door casing is a two-dollar fix. Left alone through two dry seasons, the gap widens, the paint cracks around it, and now you’re touching up an entire wall instead of one corner.
Mechanical Systems and Permit-Pulled Work
Any major remodel pulls permits, and permit-pulled work has an inspection history that matters more than most homeowners realize. If a future insurance claim involves water damage, fire, or structural issue, the insurer will look at whether the permitted work was maintained. An annual check that documents your mechanical systems protects that inspection record.
Here’s what to verify at 90 days and again at 12 months:
- Under-sink plumbing: Run water, then check every supply line and drain connection with a dry paper towel. A slow weep shows up as a damp spot on the towel.
- Ventilation fans: Turn on the bath fan and hold a tissue to the grille. If the tissue doesn’t pull, the fan or duct is blocked, and moisture isn’t leaving the room the way it should.
- Dishwasher and washing machine connections: Check the supply hoses and the drain hose for any sign of drip or corrosion, especially at the fittings.
- GFCI outlets in wet areas: Press the test button on each. If it doesn’t trip, the outlet needs service.
- Water heater and HVAC condensate lines: If your remodel touched either, check for standing water in the drain pan or condensate tray.
Pulled permits and passed inspections are part of what you paid for in a full general contractor in Whitney project, and keeping the record clean is what protects the value of that work. A free annual walk-through is cheap; a denied claim because a slow leak went unnoticed for two years is not.
What’s Inside a Guarantee Window and What Isn’t
This is the question we get most often, and it’s a fair one. What’s a warranty call, and what’s just life? Understanding the line saves you a phone call (or makes sure you make the right one).
Under the Penhallow 365-Day Done Right Promise, if it’s not done right, we make it right, in writing, on every project. That covers workmanship failures inside the first year. What that means in practice:
- Inside the window: A caulk bead that fails because it was improperly applied, tile that loosens because the thinset didn’t bond, a cabinet door that never closed right, paint that peels within a year on a surface we prepped and painted, a plumbing connection we made that weeps.
- Outside the window: Normal settling cracks in drywall that need a $15 tub of spackle, caulk that dries out after 18 months of desert sun, a screw that worked loose after a year of daily use, or damage from a leaky appliance you bought and installed yourself. These are maintenance items, not guarantee items.
- Manufacturer warranties: Some products carry their own coverage alongside ours. Cambria quartz, for example, carries a manufacturer warranty, and James Hardie siding has its own finish warranty. That gives you two layers of protection, not one.
The rule of thumb: if the failure traces back to how the work was done, it’s ours. If it traces back to time and normal use, it’s maintenance. When in doubt, call and ask. A live person answers, and we’d rather hear about a $20 problem a month early than a $2,000 one a year late.
How to Document Work for a One-Year Callback
The one-year callback conversation goes better for everyone if you have a record. Not a file of lawyers’ letters; just photos and dates. Here’s how to build it in about ten minutes of work:
- Photograph the finished work the day it’s done. Wide shots and a few close-ups of the areas most likely to be maintenance points: under the sink, the shower corner, the cabinet hinges, the exterior caulk lines.
- Note the date of completion and keep it somewhere you’ll find it in twelve months. An email to yourself with the photos attached works fine.
- Photograph every issue you find at 30, 90, and 180 days with a coin or a ruler in the frame so size is clear. Include the date in the filename.
- Keep the warranty paperwork – both the written guarantee and the manufacturer product documents. A folder in your files or a photo of each document in the same email thread works.
- Make the one-year call before the window closes, not the day after. If a fix is needed, that’s a free visit, and it’s easier to schedule when you’re not racing the expiration date.
This kind of record is also useful if you ever sell the home. A buyer inspecting a freshly remodeled kitchen in Whitney will want to see that the work was maintained. Photos of the 30-day and 90-day checks look like ownership, and they support the value of a kitchen remodeling in Whitney project that you’re asking a buyer to pay a premium for.
Common Mistakes to Avoid
- Skipping the 30-day check. This is the check that catches 80% of fixable issues while they’re free. Almost nobody does it, and almost everyone wishes they had.
- Caulking over a problem instead of fixing it. Putting a fresh bead of caulk on a soft joint or a discolored shower corner traps moisture behind the caulk and makes the eventual repair worse. If the joint is failing, the substrate under it may be too.
- Treating settling cracks like a warranty claim. Hairline cracks in drywall or grout in the first 12 months are normal, and fixing them is part of maintenance. Save the warranty conversation for workmanship failures.
- Ignoring exterior paint for the full year. In Whitney’s UV, the south and west walls show failure points by month six, not month twelve. If you wait, you’re paying for prep you could have avoided.
- Not photographing the finished work. A one-year callback is much easier to resolve and much faster to schedule when there’s a clear before/after record.
- Letting a slow leak drip for “a little while.” Every slow plumbing weep we’ve seen started as a $20 fitting and turned into subfloor damage. If you see a damp spot, call.
- Forgetting that cabinet hardware moves. A door that starts to rub at month four is a five-minute adjustment. Left for two years, it wears the door edge and the finish, and then it’s a repair.
See the difference
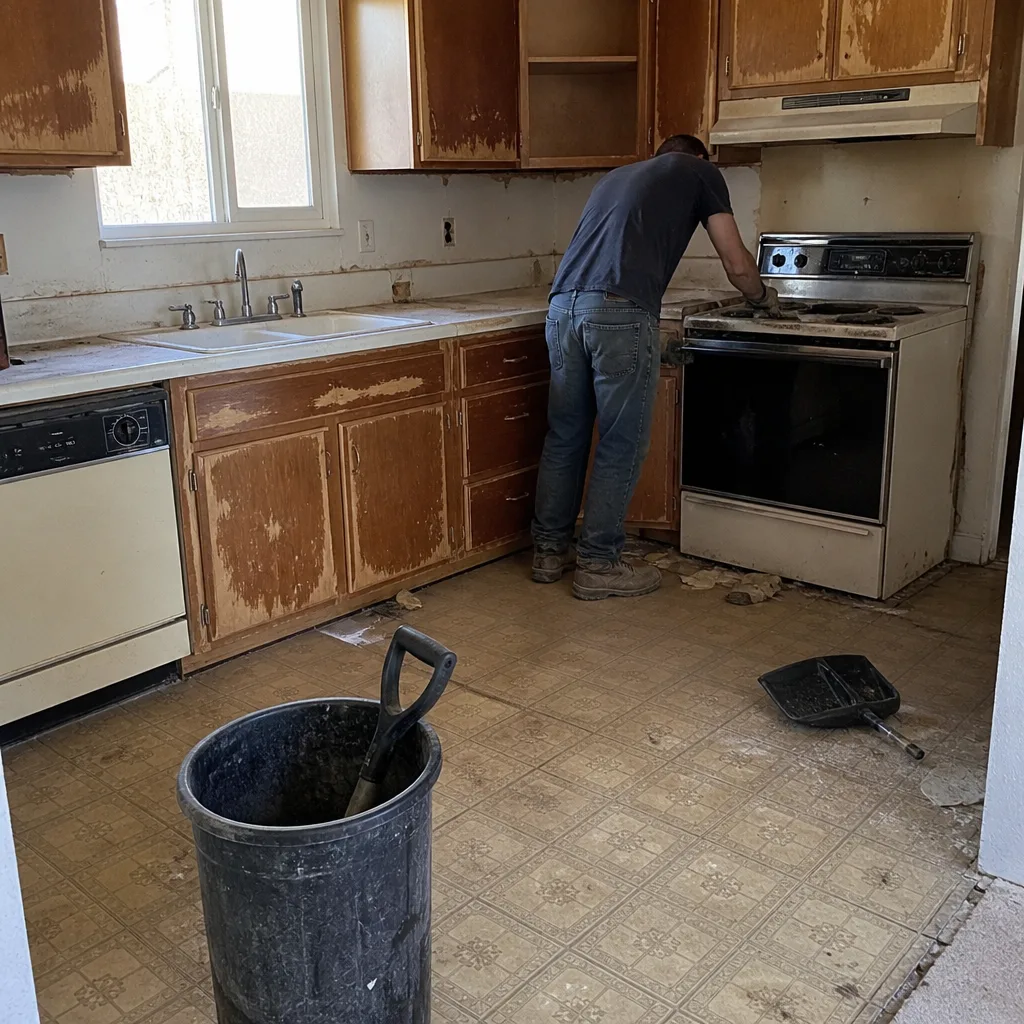 Before
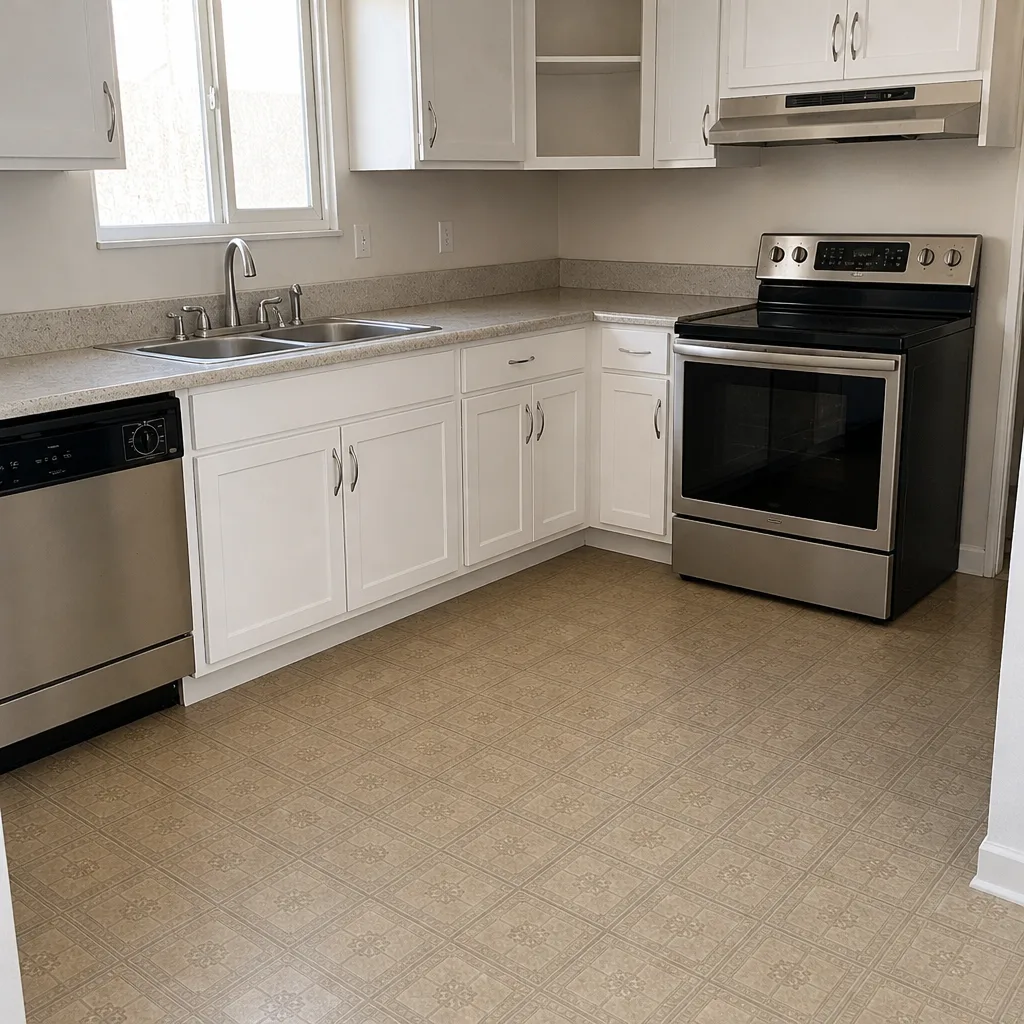 After
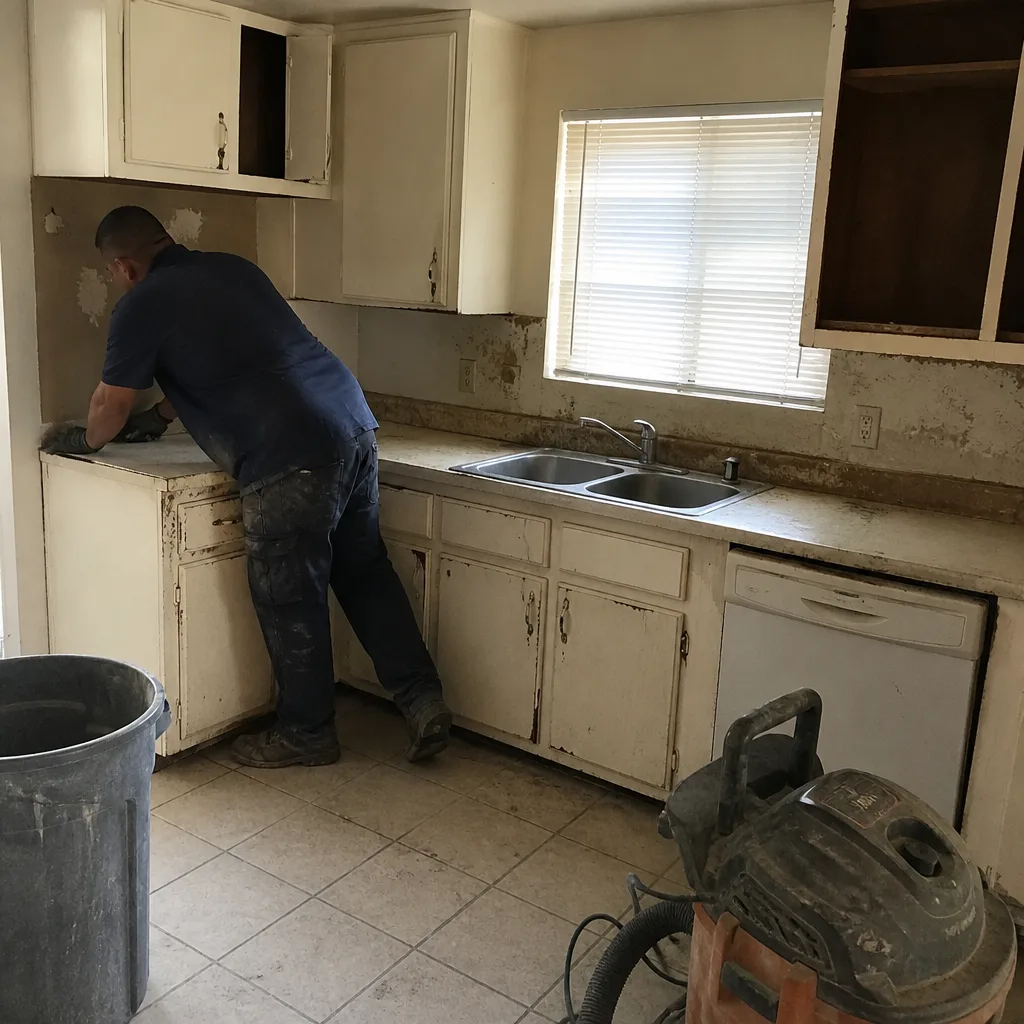 Before
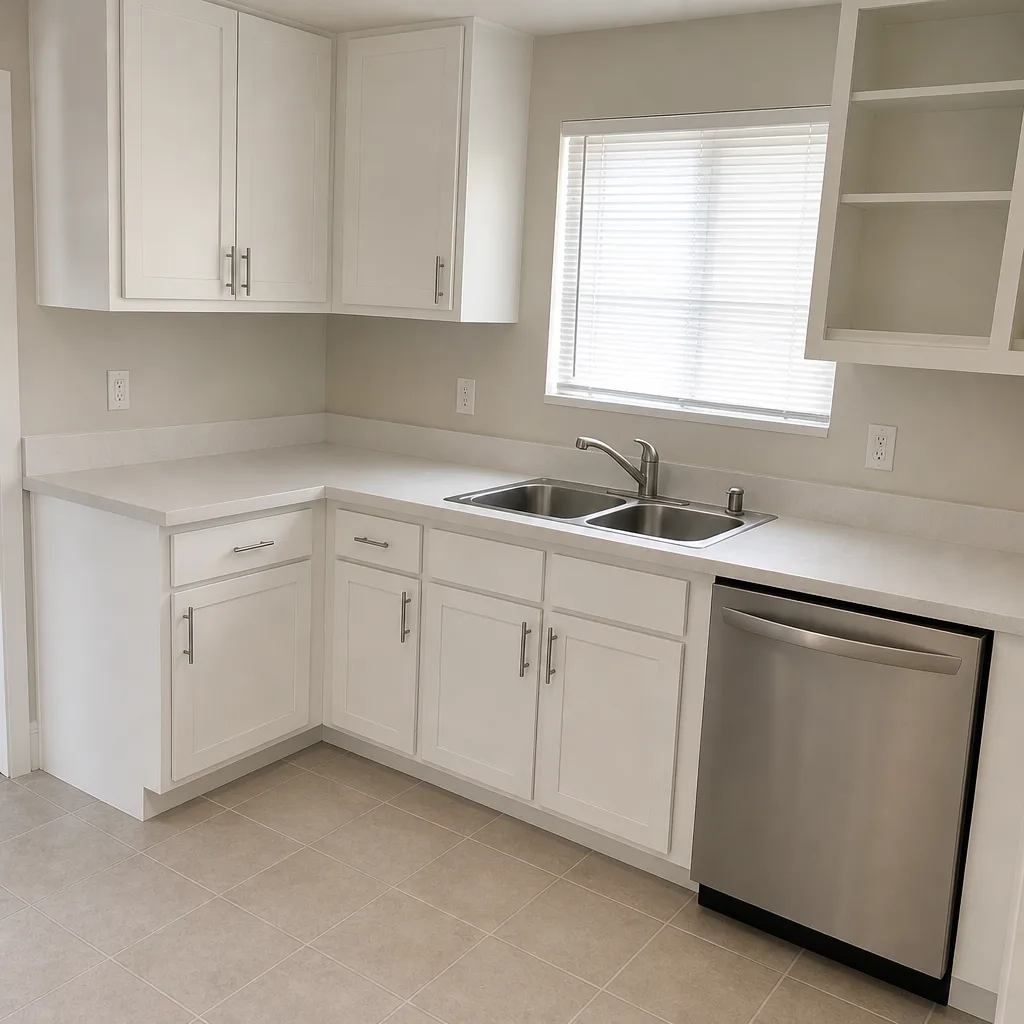 After
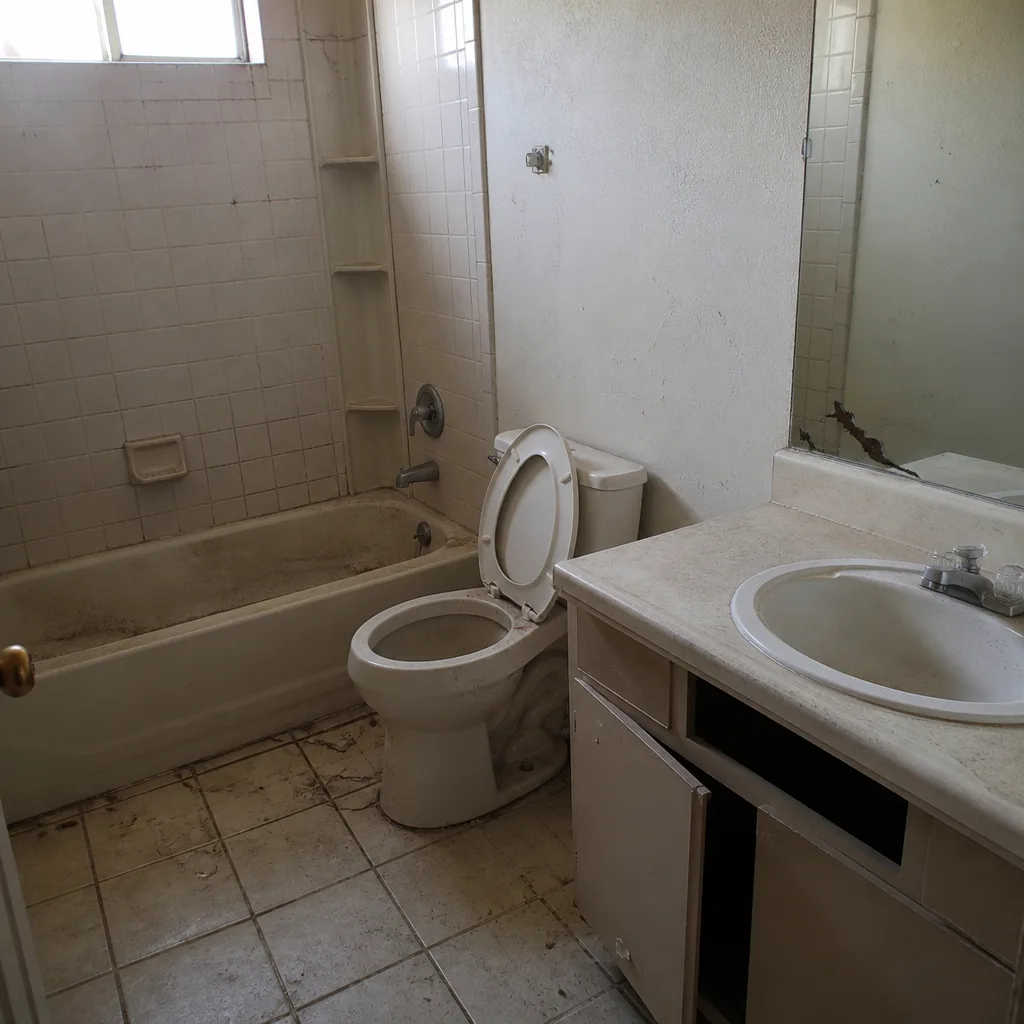 Before
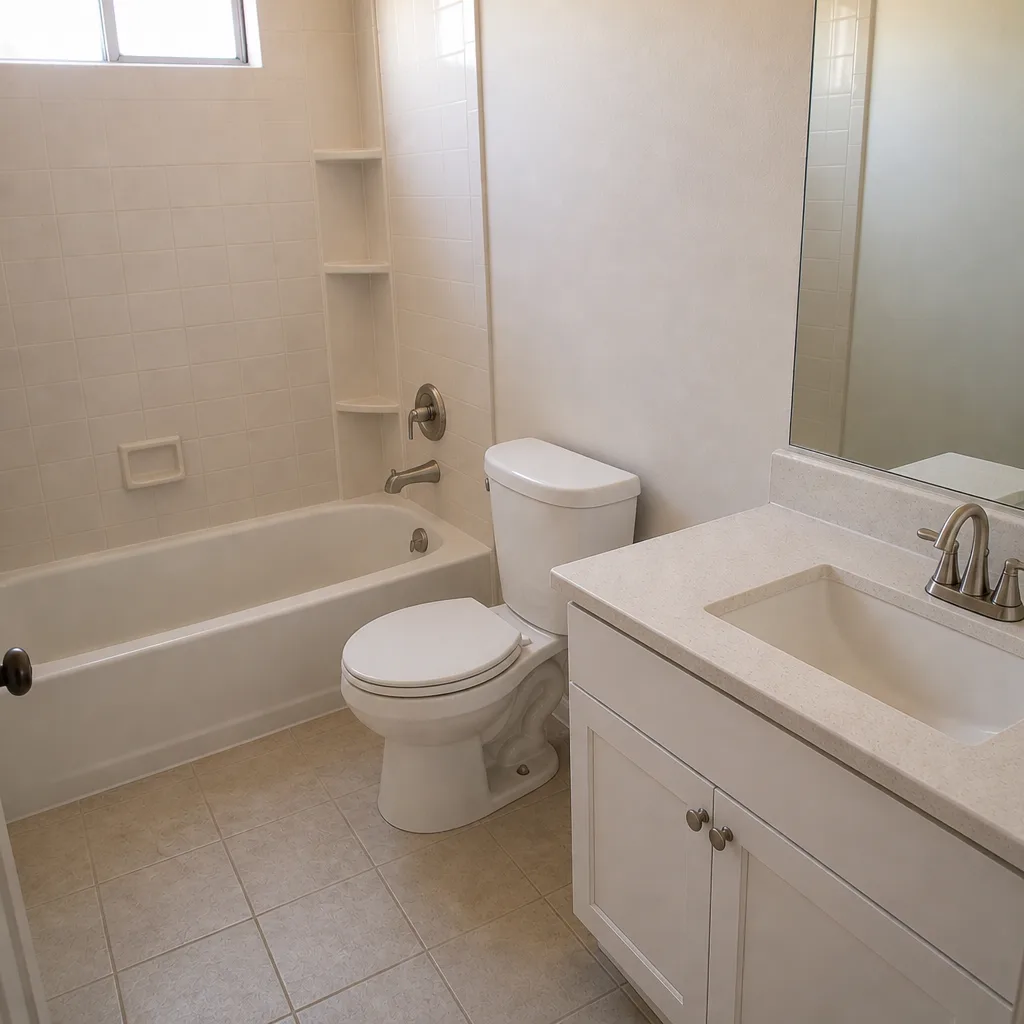 After
When to Call a Professional
Most of the checklist above is homeowner-level work: a caulk gun, a screwdriver, a sponge. Call us for the specific situations where an untrained eye can miss something expensive. A soft spot under floor tile, a shower corner that keeps discoloring after cleaning, a plumbing weep that returns after you’ve wiped it, a GFCI outlet that won’t trip, or paint peeling on a freshly painted exterior surface inside the first year. Those are all worth a call, and some of them are covered. Penhallow Remodeling Whitney offers free estimates in Whitney – call (833) 721-7402 and a live person picks up. You can also read more about Penhallow Remodeling Whitney home to see how the guarantee works before you call.
Frequently Asked Questions

Check at 30 days, 90 days, 6 months, and 12 months in the first year, then move to an annual schedule. The 30-day and 90-day checks catch the settling and hardware issues that are cheap to fix at that point; the 12-month check should happen before your workmanship guarantee window closes. Call (833) 721-7402 for a free estimate on any repair you’re unsure about.
Yes. Whitney’s low humidity and high UV exposure dry out latex caulk faster than in more humid climates. A bead that might last two years on the East Coast can crack in ten to fourteen months here. Check the kitchen sink and shower caulk every 12 to 18 months and reapply when you see hairline gaps. Call us for an exact quote on re-caulking or for a free estimate on a larger repair.
Usually not, and it’s worth knowing the difference up front. Hairline cracks in drywall or grout in the first year are normal movement, not workmanship failure, and are considered maintenance. A crack that widens steadily or a tile that loosens from the substrate is a different story and does fall under the guarantee. Call (833) 721-7402 to talk through what you’re seeing – estimates are free.
Yes, because inspections verify the work was installed correctly, not that it stays correct. An annual check of plumbing connections, ventilation fans, and GFCI outlets protects the record of the permitted work and matters if you ever make an insurance claim. Call (833) 721-7402 for a free estimate if any mechanical item doesn’t test the way it should.
The 365-Day Done Right Promise runs for one year from the completion of the project. If a workmanship issue shows up inside that window, we come back and make it right in writing. That free visit is part of the guarantee, and there’s no service call fee. Call (833) 721-7402 to schedule your free estimate or to ask what’s covered before work starts.
Letting a slow leak go unnoticed. A $20 plumbing fitting that weeps under a sink can damage the cabinet, the counter, and the subfloor over months before you spot it. Check under every sink every three months with a dry paper towel. Call (833) 721-7402 for an exact quote on a repair – estimates are free.
The Bottom Line
The year after a remodel is not the finish line; it’s the year when small maintenance items decide whether you have a durable renovation or a long list of callbacks. Follow the schedule: the 30-day check, the 90-day re-check, a six-month exterior inspection (in Whitney that one matters more), and a 12-month review before your guarantee window closes. Photograph the finished work, keep the paperwork, and make the call when something looks wrong. The whole schedule takes a handful of hours over a year, and it’s the cheapest insurance you can buy on a five-figure project.
If you’d rather have a professional walk the finished work with you, Penhallow Remodeling Whitney does free estimates and free second visits, all backed by the 365-Day Done Right Promise. Every homeowner gets a written price before any work starts and a written guarantee with every job. Reach us at (833) 721-7402, and a live person will pick up. If you want to see how the full process works from the start, look through Bathroom Remodeling in Whitney or Kitchen Remodeling in Whitney for the full scope.
Written by the team at Penhallow Remodeling Whitney.